Objective
This details the steps to be performed to integrate *Radware Bot Manager bot mitigation with your AWS CloudFront setup.
*ShieldSquare is now Radware Bot Manager
Prerequisite
Sign up to create a Radware Bot Manager account (if you do not already have one).
How does it work?
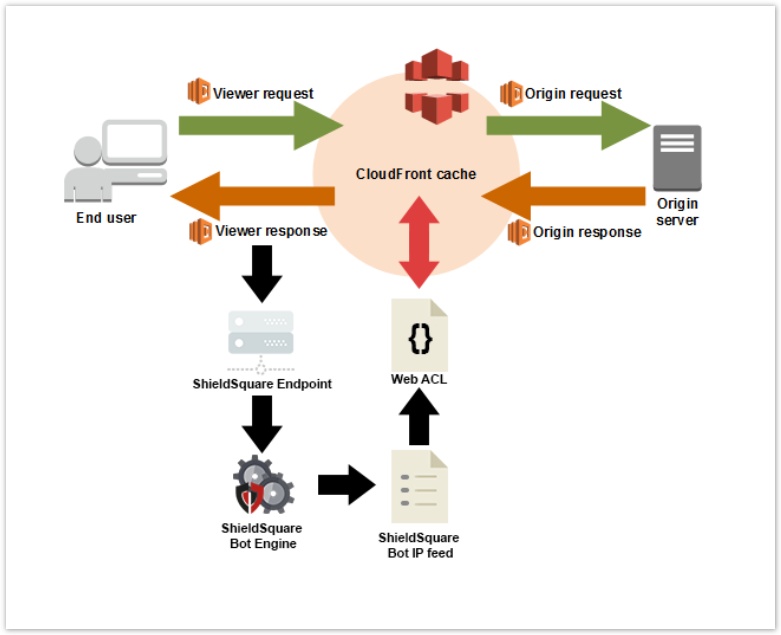
- Radware Bot Manager connector built using Lambda function should be integrated at 'Viewer response' point
- Radware Bot Manager connector to post data asynchronously to Radware Bot Manager endpoint
- Radware Bot Manager bot engine analyzes the data received from the AWS Cloudfront Lambda
- Radware Bot Manager bot engine updates the Bot IP Feed with bad signatures
- Using AWS Web ACL, bad IP addresses can be blacklisted at the AWS CloudFront
Instructions
Follow these instructions to integrate the Radware Bot Manager connector.
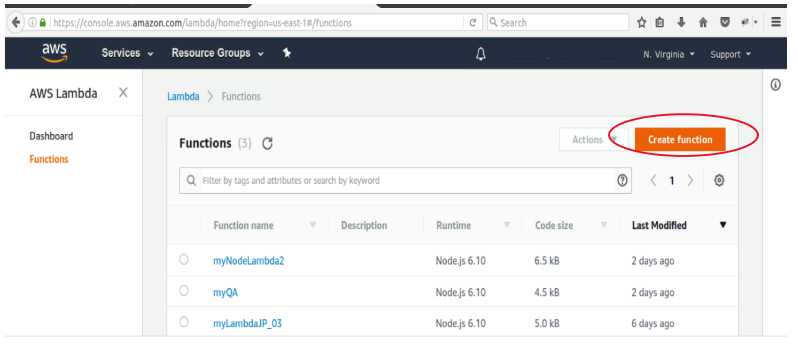
Go to https://console.aws.amazon.com/lambda/home?region=us-east-1#/ and select 'US East (N.Virginia) as the region in the top menu.
Click on 'Create Function' to create the Radware Bot Manager Lambda function.
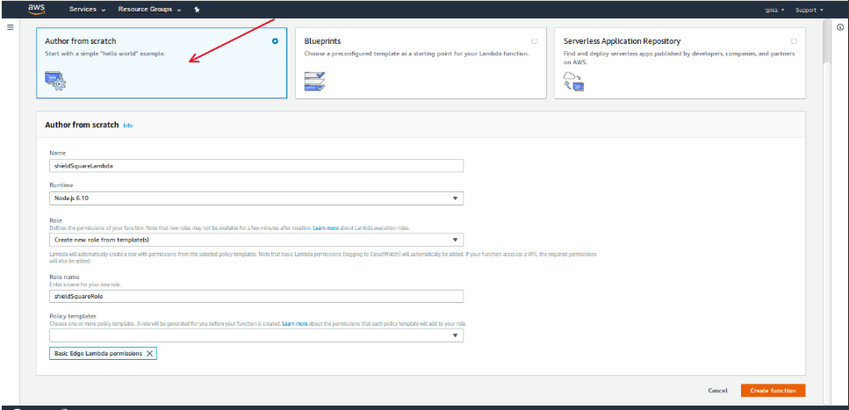
Select 'Author From Scratch' and type a name for the function (recommended: "RadwareLambda"). Set RunTime to - Nodejs 10.x
Click on “Choose or create an execution role” and select “Create a new role from AWS policy templates”.
Give role name e.g. "myRole".
For policy templates select “Basic Lambda@Edge permission (for CloudFront Trigger)”.
Click on 'Create Function' and wait for the successful creation message.
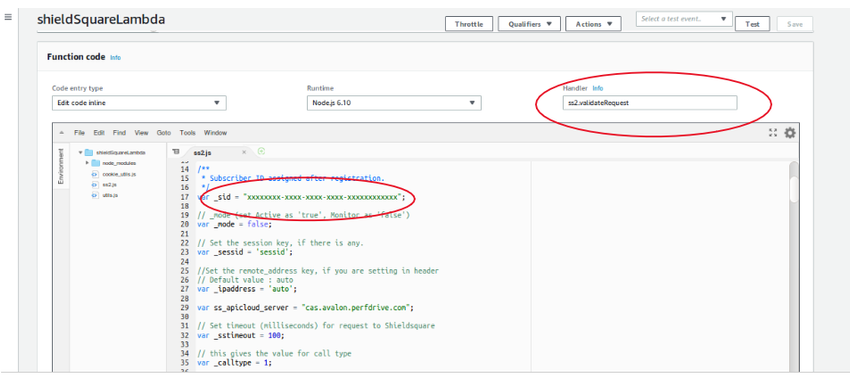
Scroll down and go to the Function code section.
Select 'Upload a .ZIP file' under Code entry type and upload the shared ss2.zip kit using the "upload from a zip file" option.
Rename the Handler from 'index.handler' to "ss2.validateRequest".
Click on 'Save' at the top right corner and you will get the Radware lambda function uploaded successfully.

Scroll down and update the '_sid' value with your subscriber production ID in ss2.js file and 'Save' the file. Select 'Actions' and click on 'Publish new version' to publish Radware CloudFront integration.
You can test the function before deploying it to CloudFront by selecting the test event 'Amazon CloudFront Simple Remote Call' in Select a test event dropdown.
Scroll down to the "Designer Add Trigger" section and select "CloudFront".
Select 'Distribution name' and scroll further to select 'Viewer Request' under the CloudFront event.
Check 'Enable trigger and replicate' and click on "Add".
Click on 'Save' to save your Radware lambda function.
Note: Ensure you select 'Viewer Request' as Event type while editing the behavior of CloudFront.
Click on 'Create Function' to create another Lambda function and Follow steps 3 and 4.
Replace index.js file code with the below code
exports.validateRequest = function(event, context, callback) {

    const incomingReq = event.Records[0].cf.request;
    const ss_response = event.Records[0].cf.response;
    try {
        if(incomingReq.headers['ss-set-cookie'] !== undefined) {
            if( ss_response.headers['set-cookie'] === undefined) {
                ss_response.headers['set-cookie'] = []
            }
            ss_response.headers["set-cookie"].push(
                { "key": "Set-Cookie", "value": incomingReq.headers['ss-set-cookie'][0].value },
                { "key": "Set-Cookie", "value": incomingReq.headers['ss-set-cookie'][1].value },
                { "key": "Set-Cookie", "value": incomingReq.headers['ss-set-cookie'][2].value },
                { "key": "Set-Cookie", "value": incomingReq.headers['ss-set-cookie'][3].value }
            )
        }
    }catch(err){
        console.log("[ShieldSquare]: Cannot set cookie because ss-set-cookie not found." );
        console.log("[ShieldSquare]: " + err);
    }
    callback(null, ss_response);
}
|
- Rename the Handler from 'index.handler' to "index.validateRequest"
- Click on 'Save' at the top right corner and you will get the Radware lambda function uploaded successfully.
11. Scroll down to "Designer Add Trigger" and select "CloudFront".
- Select 'Distribution name' and scroll further to select 'Viewer Response' under the CloudFront event.
- Check 'Enable trigger and replicate' and click on "Add".
- Click on 'Save' to save your Radware Bot Manager lambda function.
Write to botmanager_support@radware.com for clarifications.
